|
Installing A Wood Deck
By Rich Hughes The question of deck replacement is commonly asked by people trying their hand at boat restoration. This is a method introduced to me by Dwight Boyd of Clarion Boats almost 25 years ago, and which I can now say has stood the test of time. Enjoy.
|

|
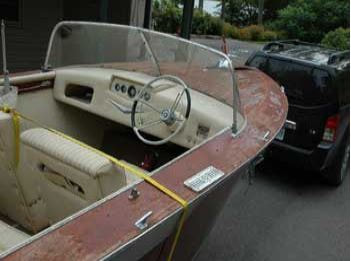
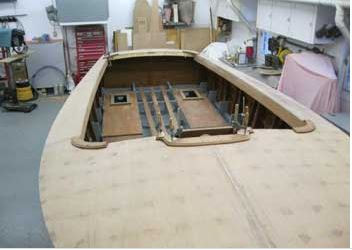
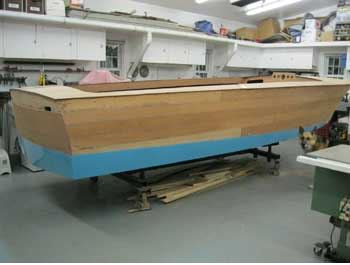
1 - This is a "before" photo of the deck that will be replaced. It doesn't look bad, but the next pictures will show why it will be replaced.
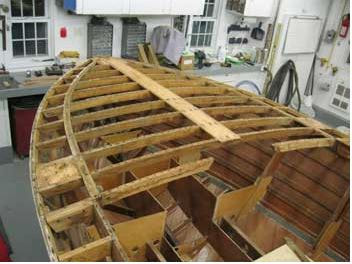
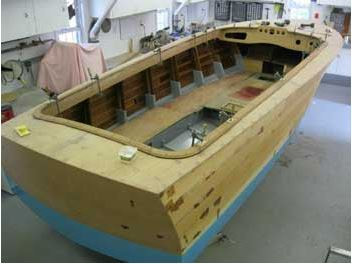
3 - The planks are removed and reveals some legacy issues with the framework. It is common to have a bit of frame damage. Time to remove each frame that has damage and replace it.
|
2 - The old deck is removed. No tricks here. Just pry-bars and slivers. In the case of this boat, the deck planks were screwed on but also edge nailed. Makes removal a bit more difficult.

4- Opps! Too far!! Just kidding. The original frames were not of good quality, so easier to start from scratch.
|
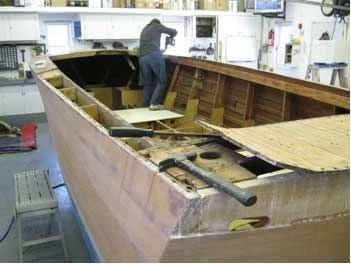
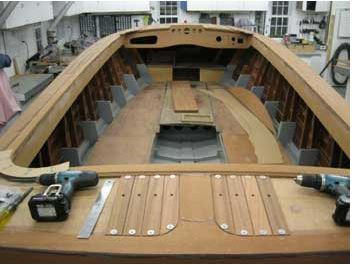
5 - New deck frames being fitted into place using an original frame for positioning.

7 - 1/4" marine mahogany ply sub-skin being fit. After fitting, the plywood is removed and the back side epoxy coated before permanent install to the frames.
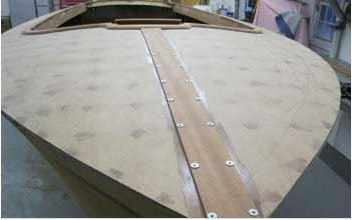
9 - Plywood sub skin is installed and any screw holes are epoxy filled. On a racer or boats that may take more abuse, I like to epoxy a 4oz cloth covering over the plywood. The corners of a raised deck combing are fitted in place. Not original, but a nice look.
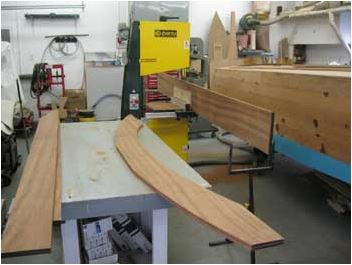
11 - 1/8" hardboard templates are made of the covering board’s shapes, and then both sides are cut from a single piece of mahogany and split down the middle to give a book-match look. Again, don't spend a lot of time trying to get the outside edge exact, it will be flush trimmed later.
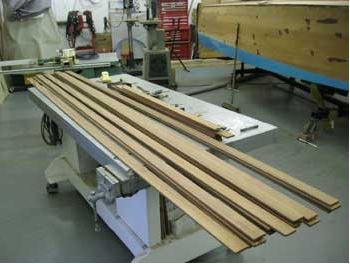
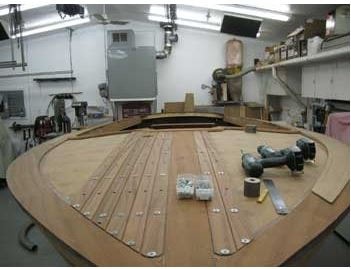
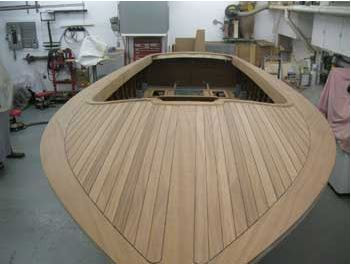
13 - The individual deck strips are cut and planed. If you can, mark the final thickness on your planer. It makes it easier if you have to plane more stock.
15 - Here is what the individual strips look like before being installed. Note the plug holes are not drilled all the way through. This helps keep the epoxy on the underside of the plank and not squeezing out onto the top of the deck.
17 - The rear deck being fitted. Note the template used to make the 4 combing corners.
19 - The quality of stain can be judged by how long it stays on your fingers. Three to four days and its good stuff. Don't do staining before any social event. Also learned the hard way.
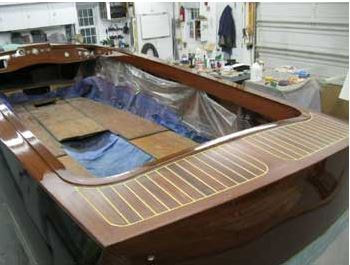
21 - This is just after completing the rear deck for lines. The haze you see is residue from the caulking. I find mineral spirits or paint thinner good for clean-up.
|
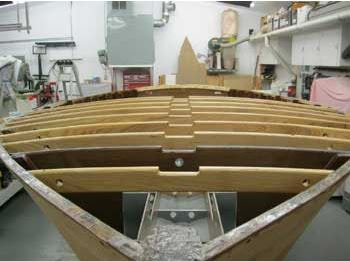
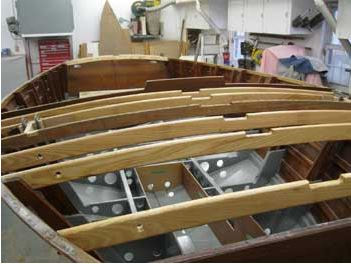
6 - New frames in place. Everything gets epoxy coated before the covering goes on. Easier reaching down than reaching up
8 - When cutting the deck covering, leave the outside edges rough and proud of the hull edge. The final trimming won't need to be done until later.
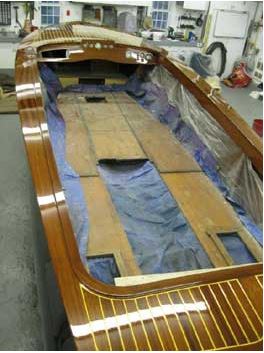
10 - The 5/8" raised combing is glued in place. A new dashboard was also required and can be seen here. The dash is also laminated with a 3/8" ply backing to better support the stresses of the steering wheel.
12 - The solid mahogany deck planks are just over 1/4" thick. The screws and fender washers you see are holding the plank in place until the epoxy cures. All screws are then removed and the holes plugged.

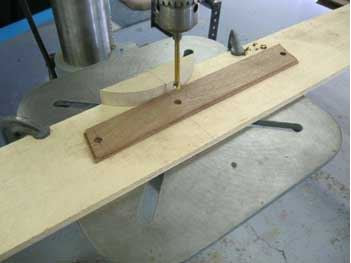
14 - The deck groves are cut by lowering the blade on the table saw, and with help from this little jig. It keeps the depth consistent and your fingers intact.
16 - I like to fit about half a dozen strips before permanently fastening them and fitting the next batch. Too many at once and they could start to "grow". I learned that one the hard way.
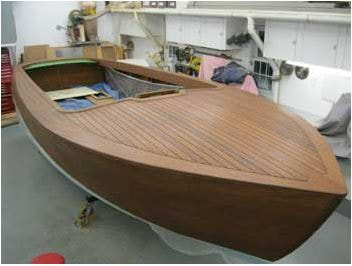
18 - The new deck installed, plugged and prepped ready for stain.
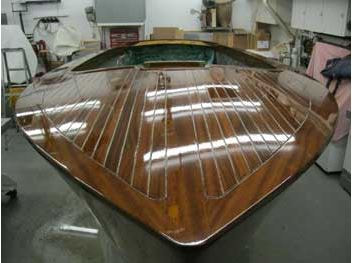
20 - I like to get about 6 coats of varnish on before putting in the deck lines. It allows for some sealant to get in the bottom of the groves and lets you have a few sanding coats. The smoother the varnish, the easier it is to work with the deck caulking.
22 - The first couple varnish coats over the cured lines will draw up a lot of residue in the finish. Once they are sealed up, you are on your way to the final coats. The advantage of the laminate deck over the traditional plank method is the boards do not shrink and swell causing cracks in the deck lines. It also makes for a very solid structure. And as far as not being original, it is very difficult to spot the difference.
|